
Install by platform
Next.js and React
Install npm install @blipit/nextjs
@blipit/nextjs gives you browser errors, web vitals, session replay and the Report a bug button from one component in your layout, and server component, route handler and server action errors from one line in instrumentation.ts. Plain React apps use @blipit/browser.
1Install
npm install @blipit/nextjs2Get your keys
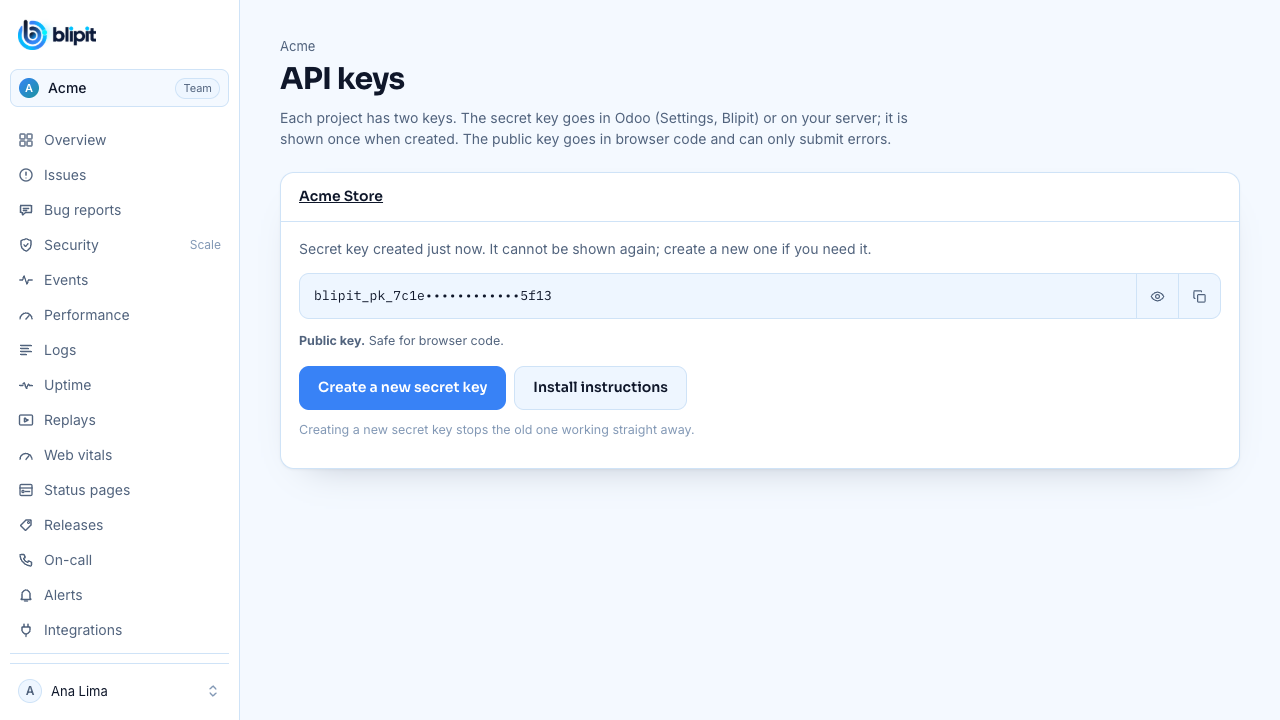
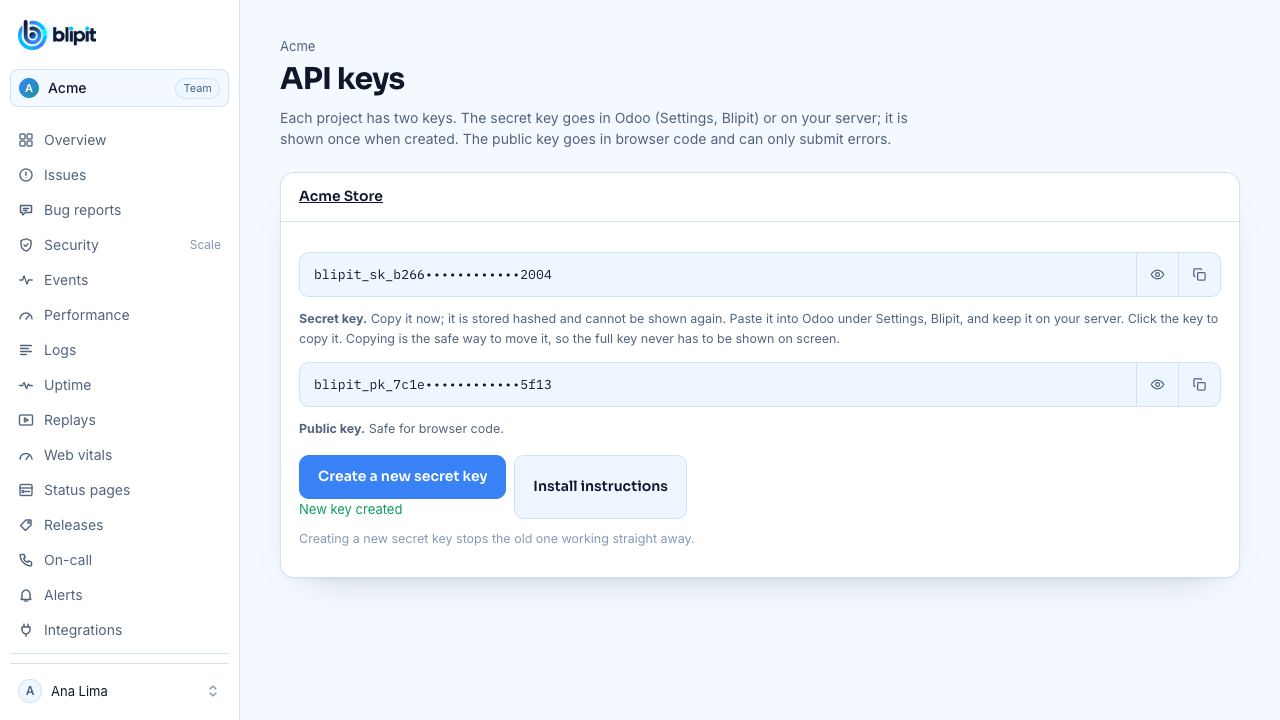
Sign in at app.blipit.io and open API keys in the sidebar, then your project. Every project has two keys. The public key starts with blipit_pk_: it goes in browser and app code, can only send events, and is safe for anyone to see. The secret key starts with blipit_sk_: it stays on your server or in Odoo, never in a browser, because it can also read and change issues. The secret key is shown only once, right after it is created, so copy it then; if you lose it, press Create a new secret key, and the old one stops working at once. Some SDKs also need the project id, shown on the same page.
3Put the keys in .env.local
Create .env.local in the project root with the public key for the browser and, if you use the server side below, the secret key for the server. Only names that start with NEXT_PUBLIC_ reach the browser, so never give the secret key that prefix. Restart npm run dev after saving the file. For production, add the same variables in your host (on Vercel: Project, Settings, Environment Variables, for Production and Preview) and deploy again: NEXT_PUBLIC_ values are written into the build, so a deployment made before you added them has an empty key.
NEXT_PUBLIC_BLIPIT_KEY=blipit_pk_your_public_key
BLIPIT_SECRET_KEY=blipit_sk_your_secret_key4Browser side
Add the component once in the root layout. It reads the public key from NEXT_PUBLIC_BLIPIT_KEY. If the variable is empty, it starts nothing and says so in the browser console.
import { Blipit } from "@blipit/nextjs";

export default function RootLayout({ children }: { children: React.ReactNode }) {
  return (
    <html lang="en">
      <body>
        <Blipit
          publicKey={process.env.NEXT_PUBLIC_BLIPIT_KEY!}
          environment={process.env.NEXT_PUBLIC_VERCEL_ENV ?? "development"}
          release={process.env.NEXT_PUBLIC_VERCEL_GIT_COMMIT_SHA}
          replay={{ onErrorSampleRate: 1 }}
        />
        {children}
      </body>
    </html>
  );
}5Server side
Next.js 15 and later call onRequestError for errors in server components, route handlers and server actions. One line in instrumentation.ts wires it to Blipit. From @blipit/nextjs 0.2.1 the same line also works in apps with a middleware.ts and in Edge routes (runtime = "edge"): the app builds, and middleware and Edge errors are reported too. Next.js 14 has no onRequestError, so wrap each route handler and server action in withBlipit instead, as in the second example: it reports the error and throws it again, and skips redirects and notFound(). Set BLIPIT_SECRET_KEY in the server environment, never as NEXT_PUBLIC_.
export { captureRequestError as onRequestError } from "@blipit/nextjs/server";import { withBlipit } from "@blipit/nextjs/server";
export const GET = withBlipit(async (request: Request) => {
return Response.json(await loadOrders());
});6Dependencies and server health
From @blipit/nextjs 0.3, export register as well, so Blipit starts when the server boots. It then records database and outside-service calls on the Dependencies page and the server's CPU, memory and event loop on Server health. It does nothing in the Edge runtime. On Vercel, register may not see the incoming request: from @blipit/nextjs 0.4, wrap route handlers and server actions in withBlipit and each becomes a request on the Pulse page with its database and outside-service calls, sent after the response without delaying it.
export { captureRequestError as onRequestError, register } from "@blipit/nextjs/server";import { withBlipit } from "@blipit/nextjs/server";
export const GET = withBlipit(async (request: Request) => Response.json(await loadOrders()));7Errors caught by error.tsx
Errors that an error.tsx or global-error.tsx boundary catches never reach the browser's error handler, so report them from the boundary. Both files are client components.
"use client";

import { useEffect } from "react";
import { captureException } from "@blipit/nextjs";

export default function Error({ error, reset }: { error: Error & { digest?: string }; reset: () => void }) {
  useEffect(() => {
    captureException(error);
  }, [error]);
  return (
    <div>
      <p>Something went wrong.</p>
      <button onClick={() => reset()}>Try again</button>
    </div>
  );
}"use client";
import { useEffect } from "react";
import { captureException } from "@blipit/nextjs";
export default function GlobalError({ error }: { error: Error & { digest?: string } }) {
useEffect(() => {
captureException(error);
}, [error]);
return (
<html>
<body>
<p>Something went wrong.</p>
</body>
</html>
);
}8Keep keys out of git
Keep keys in environment variables or your host's secret settings, never in code you commit, and add your .env files to .gitignore. A public key in a web page is normal. If a secret key ever ends up in git, a public page, a screenshot or a chat, open API keys, press Create a new secret key, and paste the new key wherever the old one was used: the old key stops working straight away.
.env
.env.local
.env.*.local9Content Security Policy
If your site sends a Content Security Policy, allow script-src https://blipit.io (the script tag, and the reporter editor and replay add-on, which load from blipit.io/sdk/<version>/ on first use), connect-src https://in.blipit.io (events, screenshots and screen recordings all go to in.blipit.io), img-src data: (the screenshot is drawn from an image of the page) and media-src blob: (recordings play back in the reporter). The screenshot reloads the page's images and fonts, so their hosts belong in connect-src too, or they are left blank. No style-src change is needed. With the script tag, call Blipit.init from your own .js file or give the inline script a nonce, because a strict policy blocks inline scripts. For voice in screen recordings, the site's Permissions-Policy header must allow microphone=(self), and display-capture=(self) for screen recording; with microphone=() recordings work without sound.
10Source maps (optional)
So stack traces show your source instead of the minified bundle, upload the maps for each release from your build step.
BLIPIT_KEY=<secret key> npx @blipit/cli sourcemaps upload .next/static --release "$VERCEL_GIT_COMMIT_SHA"11Bug reports: the Report a bug button
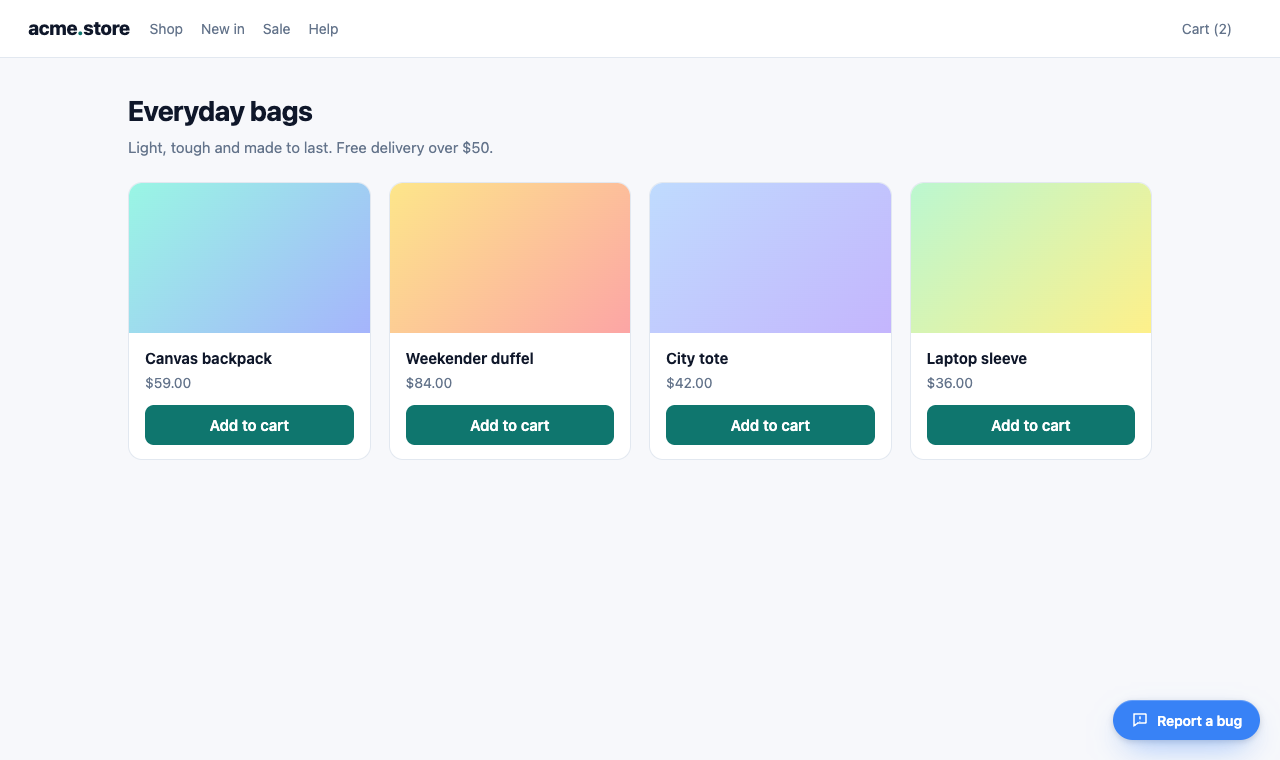
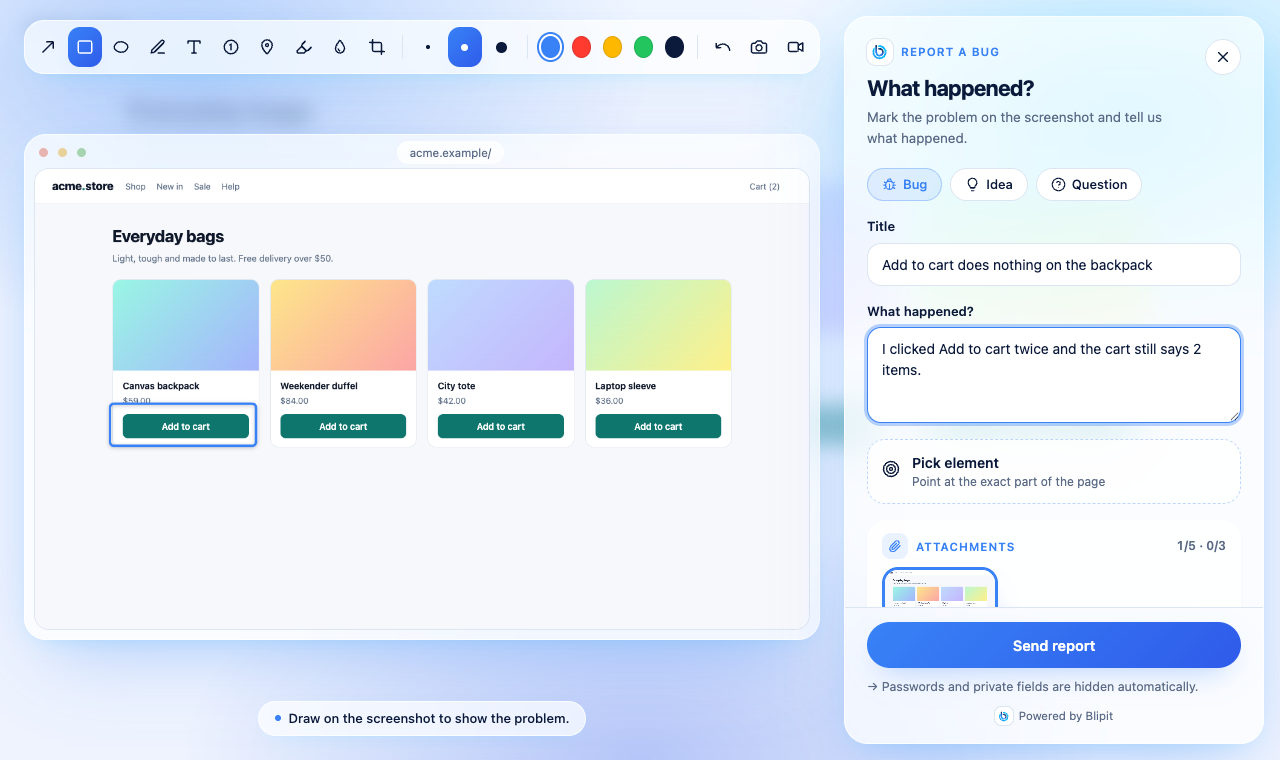
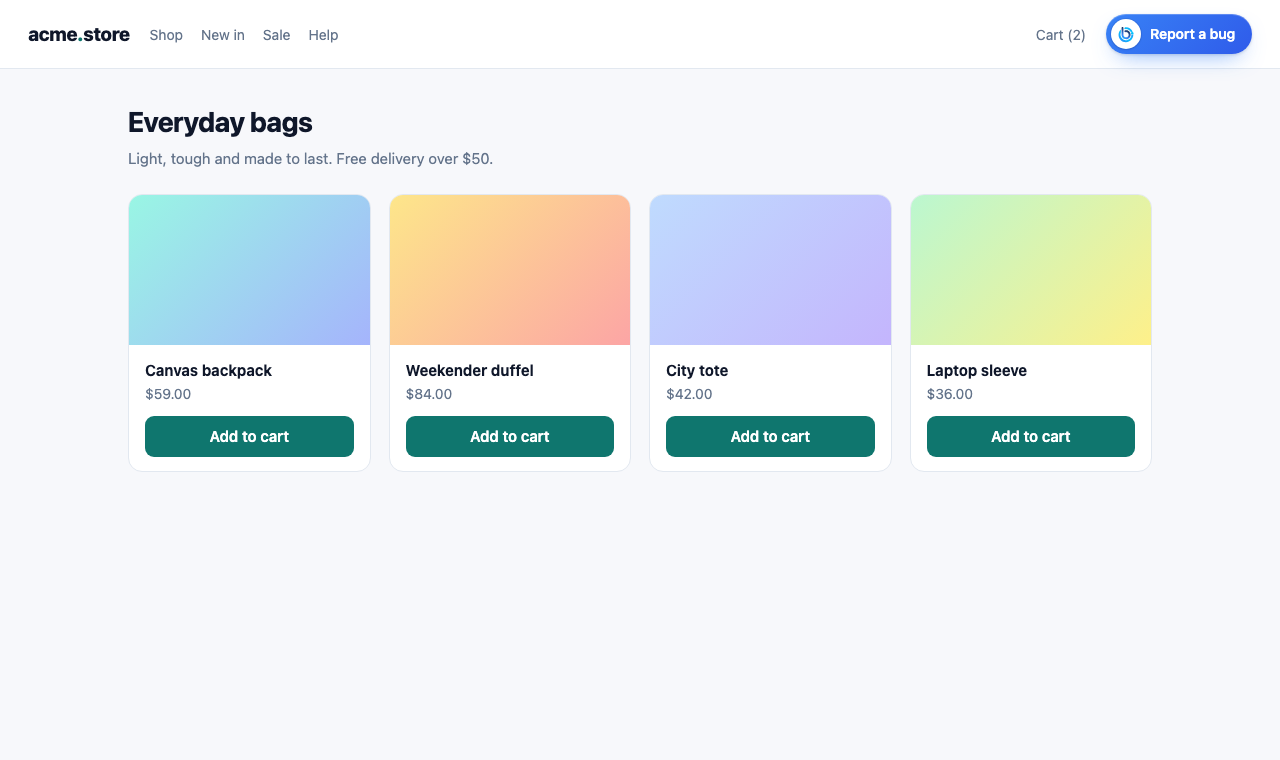
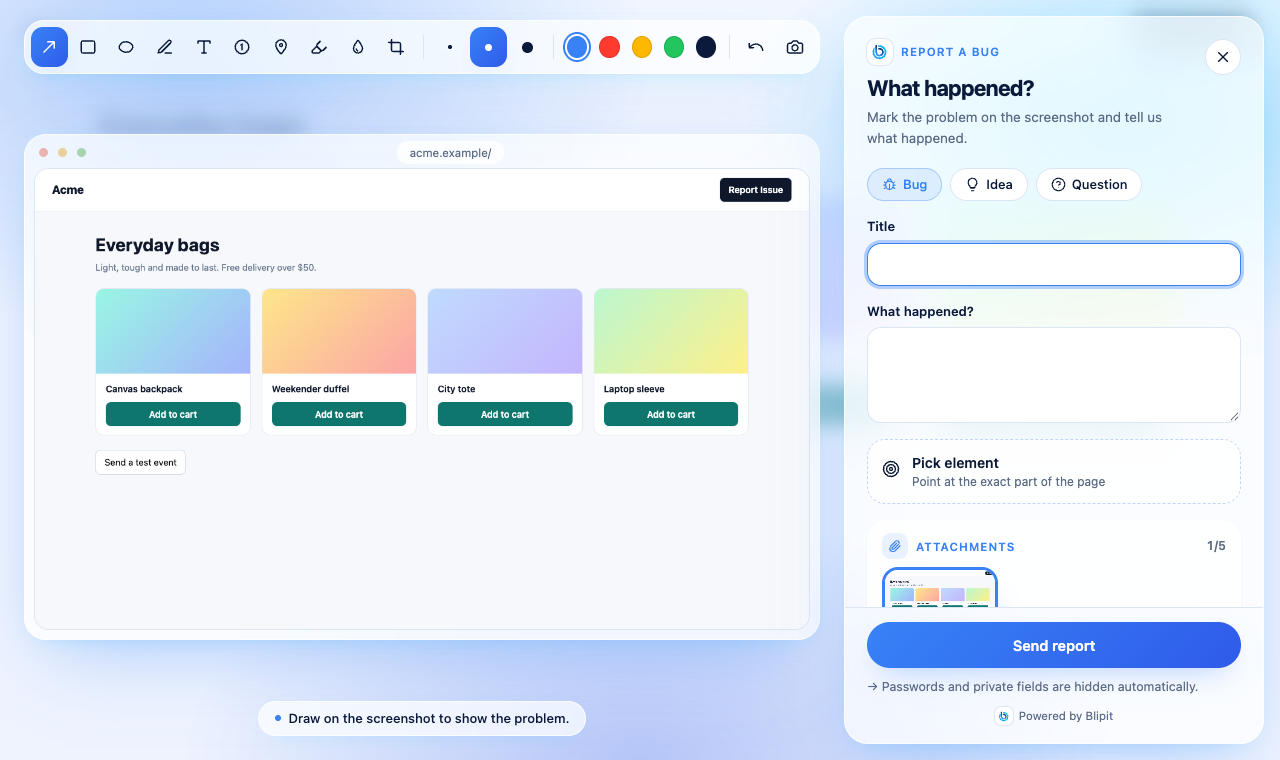
As soon as the SDK starts with your public key, a Report a bug button appears in the bottom-right corner of every page, in the visitor's language. A click opens the reporter: a screenshot of the page to mark up, an element picker, an optional screen recording, and a title and description. Change the position, style, text, colour and keyboard shortcut in code, as below, or for every site at once in app.blipit.io, Project settings, Bug report widget; options in code win. The Bug report button guide shows every option with screenshots and a live demo.
<Blipit
  publicKey={process.env.NEXT_PUBLIC_BLIPIT_KEY!}
  feedbackWidget={{
    position: "bottom-left",
    style: "icon",
    text: "Report Issue",
    color: "#E11D48",
    shortcut: "ctrl+shift+b",
  }}
/>
12Open the reporter from your own button
Put the official button anywhere with <BlipitReportButton />, also in server components: it shows the Blipit icon and Report a bug in the visitor's language and opens the reporter. Prefer your own design? The component that calls openReport must be a client component, so put "use client" at the top of its file. <Blipit /> must already be in app/layout.tsx. Plain React apps import the button from @blipit/nextjs/react and openReport from @blipit/browser.
import { BlipitReportButton } from "@blipit/nextjs";

export function Header() {
  return (
    <header>
      <a href="/">Acme</a>
      <BlipitReportButton />
    </header>
  );
}import { BlipitReportButton } from "@blipit/nextjs/react";
<BlipitReportButton variant="outline" size="sm" />"use client";
import { openReport } from "@blipit/nextjs";
export function ReportIssue() {
return <button onClick={() => openReport()}>Report Issue</button>;
}import { openReport } from "@blipit/browser";
export function ReportIssue() {
return <button onClick={() => openReport()}>Report Issue</button>;
}
14Prefill the reporter and add context
Call setUser after sign-in: the reporter's name and email are filled in, and they get an email when you reply or change the status. setReportMetadata adds your own fields, such as the plan or the cart size, to every report; it runs when a report is sent, so the values are current.
"use client";

import { useEffect } from "react";
import { setReportMetadata, setUser } from "@blipit/nextjs";

export function BlipitUser({ user }: { user: { id: string; name: string; email: string; plan: string } }) {
  useEffect(() => {
    setUser({ id: user.id, username: user.name, email: user.email });
    setReportMetadata(() => ({ plan: user.plan }));
  }, [user]);
  return null;
}15Check it works
Reload the app. The Report a bug button appears in the bottom-right corner, and within a minute the page view shows under Web vitals in app.blipit.io. Then add a button that calls captureMessage, or one that throws, and click it: the event shows under Issues within a few seconds.
"use client";
import { captureMessage } from "@blipit/nextjs";

export function TestBlipit() {
  return <button onClick={() => captureMessage("Hello from Next.js")}>Send a test event</button>;
}Good to know
- Plain React without Next.js: npm install @blipit/browser and call Blipit.init before rendering; see Any website.
- Environment and release default to VERCEL_ENV and VERCEL_GIT_COMMIT_SHA on the server when you leave them out.
- Keeping Blipit up to date: the Keeping Blipit up to date guide (docs.blipit.io/updates) explains the update banner, the emails for important releases, the notice in your development console and the update command for this platform.
- One project per app and platform: each project picks its platform when it is created (Android, iOS, React Native, Flutter, Web, Backend or Odoo), and Blipit refuses data from any other platform with a clear error, so an iOS app and an Android app need two projects with two keys. Releases, versions, crash rates and store builds differ per platform, so mixing them in one project makes all of them wrong. A Web project also takes the server side of the same web app (the Next.js server or Node), and a React Native or Flutter project also takes its own native Android and iOS crash reports.
Stuck? Email support@blipit.io. Keys and the project id for each project are under API keys in app.blipit.io.