
Install by platform
Node.js
Install npm install @blipit/node
@blipit/node captures uncaught exceptions and unhandled promise rejections on its own, adds handlers for Express and Fastify, and ships logs and login attempts with the same key. Use the secret key; it stays on the server. From 0.3 it also has one-line setup for Koa, Hono and NestJS, and a wrapper for AWS Lambda style handlers.
1Install
npm install @blipit/node2Get your keys
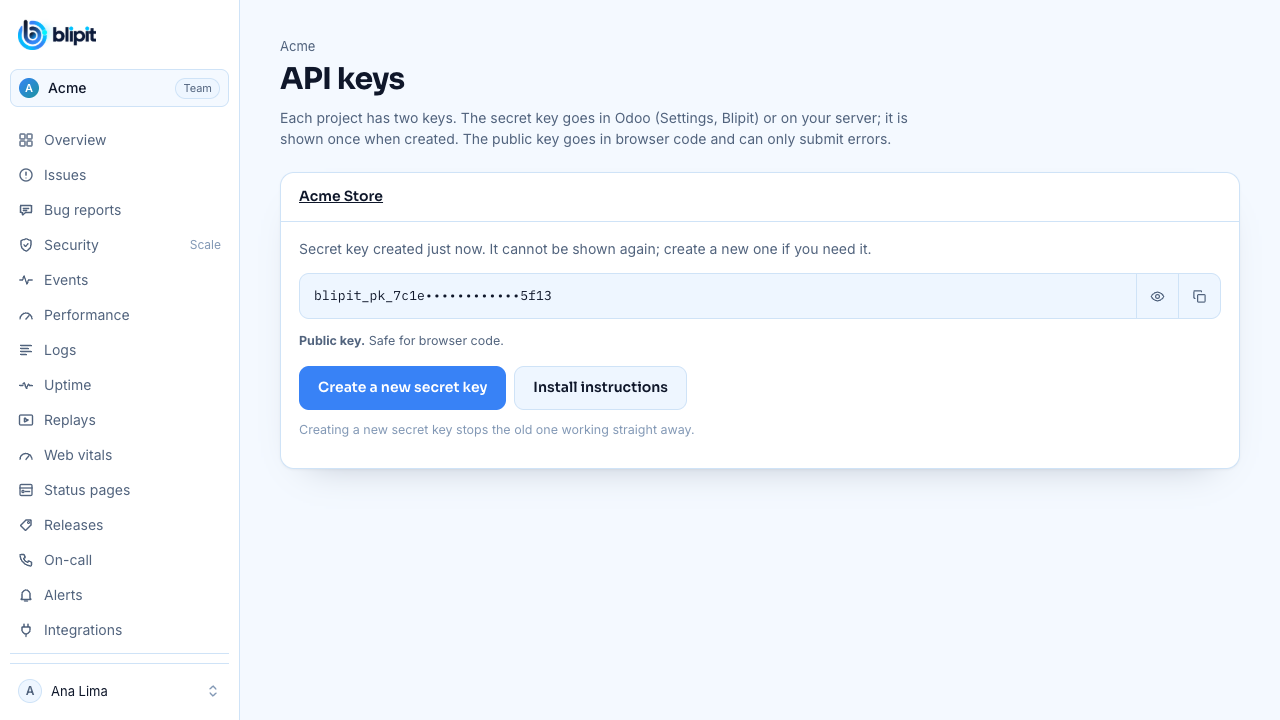
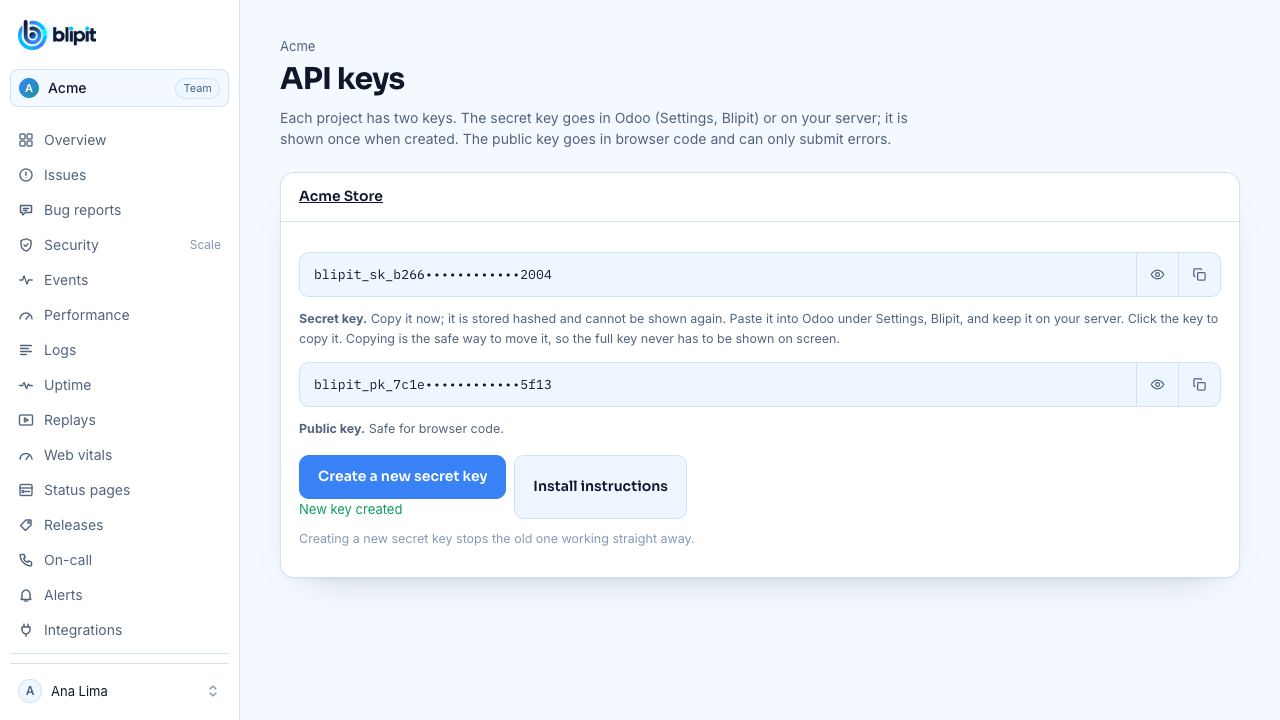
Sign in at app.blipit.io and open API keys in the sidebar, then your project. Every project has two keys. The public key starts with blipit_pk_: it goes in browser and app code, can only send events, and is safe for anyone to see. The secret key starts with blipit_sk_: it stays on your server or in Odoo, never in a browser, because it can also read and change issues. The secret key is shown only once, right after it is created, so copy it then; if you lose it, press Create a new secret key, and the old one stops working at once. Some SDKs also need the project id, shown on the same page.
3Keep the key in the environment
Node uses the secret key. Put it in an environment variable, never in code: locally in a .env file that Node 20.6 and later load with --env-file, in production in your host's environment or secret settings (Fly secrets, Docker, systemd, Render, Vercel). Restart the process after changing it.
BLIPIT_SECRET_KEY=blipit_sk_your_secret_keynode --env-file=.env --import ./instrument.mjs server.mjs4Keep keys out of git
Keep keys in environment variables or your host's secret settings, never in code you commit, and add your .env files to .gitignore. A public key in a web page is normal. If a secret key ever ends up in git, a public page, a screenshot or a chat, open API keys, press Create a new secret key, and paste the new key wherever the old one was used: the old key stops working straight away.
.env
.env.local
.env.*.local5Initialise first
Put this in a file that runs before your app, and import it first.
import * as Blipit from "@blipit/node";

Blipit.init({
  key: process.env.BLIPIT_SECRET_KEY,
  environment: process.env.NODE_ENV,
  release: process.env.RELEASE,
  serverName: "api",
});6Express, Fastify, Koa, Hono or NestJS
Add the handler after your routes so handled and unhandled errors both reach Blipit, with the request's method, URL and user agent. Koa, Hono and NestJS take one line each: Koa's middleware goes first, Hono's before the routes. They report errors with a status of 500 or above. Requests then show on the Pulse page by route, such as GET /users/:id, instead of one line per URL.
import "./instrument.mjs";
import * as Blipit from "@blipit/node";
import express from "express";

const app = express();
app.get("/", (req, res) => res.send("ok"));
app.use(Blipit.expressErrorHandler());
app.listen(3000);await app.register(Blipit.fastifyPlugin());app.use(Blipit.koaMiddleware());app.use(Blipit.honoMiddleware());app.useGlobalInterceptors(Blipit.nestInterceptor());7Serverless: AWS Lambda and Vercel
Serverless hosts pause the function as soon as it answers, and Lambda does not run Node's HTTP server, so wrap the handler. wrapHandler records the request (API Gateway, function URL and load balancer events by method and route, other events by function name), reports errors and sends everything before the handler returns; it waits only when there is something to send, at most 2 seconds. traceRequest does the same for any handler that takes a Request. On Vercel the data goes out after the response through waitUntil, so nothing is delayed. In Next.js use withBlipit (see the Next.js guide).
import * as Blipit from "@blipit/node";

export const handler = Blipit.wrapHandler(async (event, context) => {
  return { statusCode: 200, body: "ok" };
});export default { fetch: (request) => Blipit.traceRequest(request, () => app.fetch(request)) };8Manual capture, logs and login attempts
Blipit.captureException(err);
Blipit.captureMessage("cache miss rate above 50%", "warning");
Blipit.setUser({ id: "user-42" });
Blipit.log.info("order placed", { order_id: 42 });
Blipit.captureSecurity({ kind: "login_failed", actor: email, ip, userAgent, outcome: "bad_password" });
await Blipit.flush();9Dependencies and server health
From 0.2 the SDK also records your database and outside-service calls, and your server's CPU, memory and event loop. See the Dependencies and Server health guides; tracesSampleRate, tracing: false and metrics: false control it.
10Check it works
Open Issues in app.blipit.io. The first event appears within a few seconds, grouped into an issue, and the people in charge get an email.
Blipit.captureMessage("Hello from Node");Good to know
- On an uncaught exception the SDK flushes pending events, then exits with code 1; override with onFatal.
- captureConsole: true turns console.log and friends into log lines shipped to the Logs page.
- Check the installed version with npm ls @blipit/node (or pnpm list @blipit/node). pnpm 11 waits a day before it installs a new release (minimum-release-age), so on release day pnpm add quietly installs the previous version; to get the new one at once, run pnpm add @blipit/node@<version> --config.minimum-release-age=0.
- Keeping Blipit up to date: the Keeping Blipit up to date guide (docs.blipit.io/updates) explains the update banner, the emails for important releases, the notice in your development console and the update command for this platform.
- One project per app and platform: each project picks its platform when it is created (Android, iOS, React Native, Flutter, Web, Backend or Odoo), and Blipit refuses data from any other platform with a clear error, so an iOS app and an Android app need two projects with two keys. Releases, versions, crash rates and store builds differ per platform, so mixing them in one project makes all of them wrong. A Web project also takes the server side of the same web app (the Next.js server or Node), and a React Native or Flutter project also takes its own native Android and iOS crash reports.
Stuck? Email support@blipit.io. Keys and the project id for each project are under API keys in app.blipit.io.